

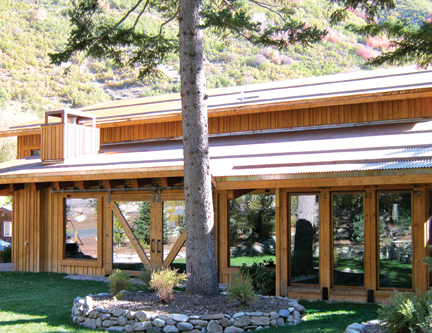
Typically composed of a layer of EPS, XPS, or polyurethane foam sandwiched between oriented strand board panels, structural insulated panels can provide R-values for walls, floors, and roofs ranging from 14 to 58, depending on the panel thickness and composition. SIPs also are manufactured to spec, which can result in reduced waste and potential labor savings.
First-time users may find working with SIPs somewhat worrisome, so we asked Frank Kiesecker, of SIP manufacturer ACH Foam Technologies, Denver, to provide some prescriptive advice that even experienced SIP users could benefit from.
1. Pre-plan electrical and equipment needs. Since SIPs are manufactured to meet the project’s specifications, it’s important to plan for electrical chases in advance to prevent time-consuming and sometimes costly modifications during installation. For example, SIP facings should never be cut horizontally for the installation of electrical wiring; doing so will compromise structural performance.
In addition, during the design phase, it’s important to determine whether there are any equipment needs for the installation of the panels. If the project specifies roof panels or wall or floor panels larger than 8x8 feet, a forklift or crane may be required for installation.
2. Organize the panels for installation. Proper storage, weather protection, and handling will make the installation process more efficient. Store the panels on a level space, no closer than three inches to the ground. Organize the panels by the sequence in which they will be installed (i.e., separate the first-floor panels from the second-floor ones), and make sure they’re covered with a breathable protective tarp to keep them dry.
3. Install the panels properly and seal them tight. SIPs need to be fully supported during installation. The panels slip over a wall plate, which needs to be set half an inch from the building edge to ensure that the panels are fully supported. Also, make sure to set the panels in place in the correct order: start in the corners or valleys and work outward. Once installed, all panel joints and voids must be properly sealed using adhesive or SIP tape to minimize air leakage and maintain the structure’s long-term durability.
4. Protect SIPs from water penetration. Once SIPs have been installed and sealed, weather protection such as housewrap is required to prevent moisture deterioration. Follow the housewrap manufacturer’s installation guidelines, and make sure to flash all penetrations. Over time, windows will leak some water at the sill. Use flashing under and around the units to direct water away from the wall structure.
5. Right-size your HVAC system. One common mistake, says Kiesecker, is underestimating the high insulating and air-sealing properties of SIPs when selecting an HVAC system. SIPs allow for smaller HVAC equipment. When working with an HVAC contractor, make sure they take into account an estimate for lower levels of air infiltration. Proper HVAC sizing is critical because an underused system will fail to reach a steady operating rate, resulting in short cycling, which is less energy efficient and requires more maintenance.
Other important factors to consider when determining HVAC sizing:
- Size of the structure (each floor should be analyzed individually)
- Orientation of building
- Type of wall construction, and associated R-value
- Window and door specs, including the number of windows and doors and their location, insulation value, and fenestration rating
- Duct location (i.e., in heated space, unheated space, attic, crawl space, etc.)
- Amount of air infiltration.
SIPs Do’s and Don’ts
|
Related Stories
| Aug 11, 2010
GBCI launches credentialing maintenance program for current LEED APs
The Green Building Certification Institute (GBCI) launched a credentialing maintenance program (CMP) for LEED APs and Green Associates, ensuring that LEED professional credentials will remain relevant and meaningful in a rapidly evolving marketplace.
| Aug 11, 2010
Construction employment shrinks in 319 of the nation's 336 largest metro areas in July, continuing months-long slide
Construction workers in communities across the country continued to suffer extreme job losses this July according to a new analysis of metropolitan area employment data from the Bureau of Labor Statistics released today by the Associated General Contractors of America. That analysis found construction employment declined in 319 of the nation’s largest communities while only 11 areas saw increases and six saw no change in construction employment between July 2008 and July 2009.
| Aug 11, 2010
Green consultant guarantees LEED certification or your money back
With cities mandating LEED (Leadership in Energy and Environmental Design) certification for public, and even private, buildings in growing numbers, an Atlanta-based sustainability consulting firm is hoping to ease anxieties over meeting those goals with the industry’s first Green Guaranteed.
| Aug 11, 2010
Architecture Billings Index bounces back after substantial dip
Exhibiting a welcome rebound following a 5-point dip the month prior, the Architecture Billings Index (ABI) was up almost 6 points in July. As a leading economic indicator of construction activity, the ABI reflects the approximate nine to twelve month lag time between architecture billings and construction spending. The American Institute of Architects (AIA) reported the July ABI rating was 43.1, up noticeably from 37.7 the previous month.
| Aug 11, 2010
Rafael Vinoly-designed East Wing opens at Cleveland Museum of Art
Rafael Vinoly Architects has designed the new East Wing at the Cleveland Museum of Art (CMA), Ohio, which opened to the public on June 27, 2009. Its completion marks the opening of the first of three planned wings.
| Aug 11, 2010
National Association of Governors adopts AIA policy of reaching carbon neutrality in buildings by 2030
As part of their comprehensive national Energy Conservation and Improved Energy Efficiency policy, the National Association of Governors (NGA) has adopted the promotion of carbon neutral new and renovated buildings by 2030 as outlined by the American Institute of Architects (AIA).
| Aug 11, 2010
Installation work begins on Minnesota's largest green roof
Installation of the 2.5 acre green roof vegetation on the City-owned Target Center begins today. Over the course of two days a 165 ton crane will hoist five truckloads of plant material, which includes 900 rolls of pre-grown vegetated mats of sedum and native plants for installation on top of the arena's main roof.


