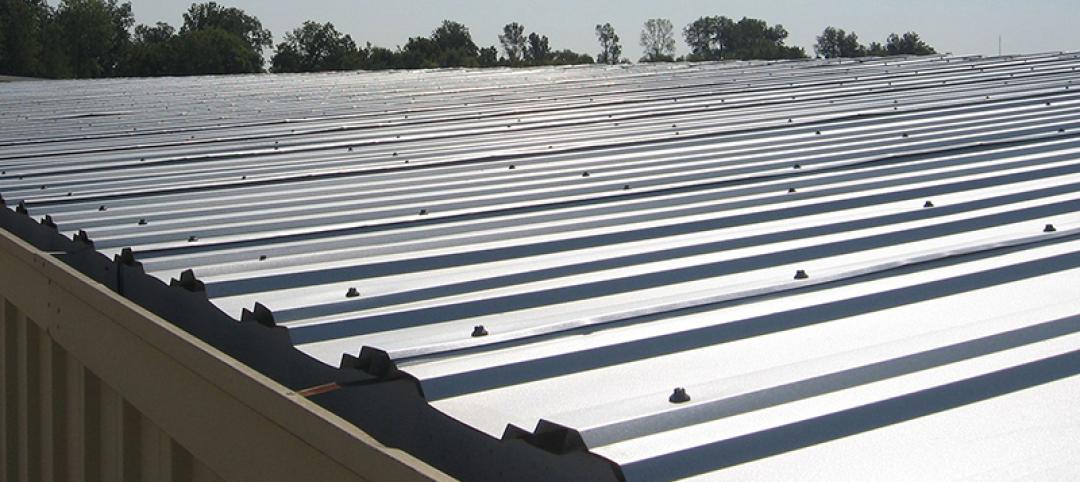
It would seem pretty logical that the most important field installation process for a standing seam metal roof is the actual process of creating the weathertight seams that connect the metal panels together and ensures the structural integrity of the roof. Perhaps for many different reasons, however, this critical step is not always given the proper attention it deserves, nor are installers given the proper training required to ensure installation runs smoothly. This approach can cause some serious issues, not the least of which is the voiding of a manufacturers warranty or the discovery of roof leaks and the resulting damage.
To help, here are some best practices for readily and successfully carrying out the metal roofing seaming process:
Personnel: Because of the critical nature of seaming metal roofs, the crew members doing this work should be properly trained. Team members who will be performing this work should not perform the seaming without having participated in the appropriate installation training required to ensure the seaming process is appropriately managed. Most roofing manufacturers offer installation training that many installers take advantage of—and this training opportunity should be taken advantage of by the staff who will be doing the seaming.
Equipment: It is very important that the seaming equipment being used is matched to the specific roof panel system being installed. Manufacturers routinely rent out this equipment in order to be sure that the metal panel profiles are installed properly and are not compromised through the use of generic equipment or that of another manufacturer. Using the wrong equipment can end up being costly for everyone if panels and seams are ruined in the process.
Hand Crimper: As metal panels are set in place, they are often secured with metal clips, spaced according to engineering and construction needs. Hand crimpers are used to form the seams around the clips as well as any end laps. This process must not be overlooked as improper hand tooling is the number one cause of faulty seaming. To ensure costly mistakes aren’t made, follow the proper process as clearly described in the “Field Seaming Tool Manual” provided with the equipment and covered in training.
Electrical Sources: The next step will involve the use of an electric seamer which obviously needs a source of electricity to operate. However, not just any electrical power source will do. Almost all professional seamers have an AC/DC motor that will require 10 or 15 amps and 120 volts. A dedicated electrical circuit—preferably from a temporary electrical pole or an existing building electrical panel—is the best and most reliable way to go. A generator with 15 amp capacity dedicated to be used only for the seamer (in order to avoid power surging) may be acceptable as well. In either case, the power line to the seamer needs to be 10-gauge (minimum) cord) and should be no more than 200 feet long (to avoid power drop).
Electrical power sources that are NOT acceptable include outlets from a powered man lift or a generator that is not dedicated to only the seamer. (This includes a generator that is part of a welding machine.) Check the manufacturer’s requirements for any other restrictions that can damage the seamer and bring the responsibility for repair or replacement to the installer.
Electric Seamer: Once all of the panels are in place, the hand crimping is done and the power source is set, then electric seaming takes care of finishing the roofing system. Again, the seamer manual should be consulted for proper procedures, including which direction the seaming should be done (up or down depending on direction of roof installation). The electric seamer includes a switch for the operator to control the starting and stopping of the process. On low-slope roofs, the operator should walk alongside the seamer to be sure nothing is in its path and that the seam is done properly. While stopping and re-starting is fine, the seamer should never be removed in the middle of a seam since it will likely be very difficult to set it back in exactly the same spot again. If something appears to be wrong with the seamer or the seams that are being produced, then don’t keep using it. There is no point in damaging multiple roof panels if any one panel indicates that things aren’t going right. In this case, contact the manufacturer right away for assistance or replacement of the seamer.
Safety: Electrical seamers are heavy and—if not used and secured properly—can cause harm or injury. Therefore, they should always be tied off with a safety line—the same type used for workers—not a common rope and definitely not the electrical cord. The safety line needs to be secured properly to the seamer and then be attached to something rigid on the building—never to a person who could be pulled off of a roof by it.
Cleaning: The electric seamer should be checked and cleaned of any oils, debris or dirt while it is unplugged from the electrical power source before it is used every day. The grease level in the machine should also be checked daily with only a little bit added (2-3 pumps from a grease gun) as needed—too much will cause the grease to leak out onto the roofing.
Following these pointers should help assure the safe and efficient use of the right seaming equipment when installing roofing panels. To find out more about proper seaming or to schedule training, contact your local MBCI representative.
More from Author
MBCI | Dec 16, 2019
Cutting Metal Panels On Site
Cutting metal panels during project installation is a common construction practice. Check out this new blog post for field-cutting techniques, tools and best practices that can help preserve metal roof and wall panel appearance and longevity.
MBCI | Nov 15, 2019
Upgrading your roof with metal panels
We’ll address some ways metal roofing systems are an advantage when upgrading your roof and restoring your building to “like-new”, weathertight condition.
MBCI | Oct 15, 2019
Should you repair or replace a roof? How to decide
There are a number of key considerations.
MBCI | Jun 12, 2019
Understanding LEED for green metal buildings
While some may think that a green building costs more and is more complicated to build, that is not actually the case.
MBCI | May 16, 2019
Metal roof installation
Metal roof installation techniques vary greatly depending on the fastening system selected.
MBCI | Apr 10, 2019
Long-life fasteners: A key component of a properly installed metal roof
The fasteners used to attach a metal roof system are a significant part of the roof performance and, in turn, of the whole building.
MBCI | Mar 25, 2019
Insulated metal panels achieve high-tech design aesthetics
The new facility is expected to increase the number of jobs within the community.
MBCI | Feb 1, 2019
Why choose Retro-R® panels?
If your existing R-panel roof is in need of replacement or repair, Retro-R® panels may be the right retrofit solution.

